Creating a Professional Text Effect
Difficulty Level: Intermediate
Agus Esperón Wideo.co Co-Founder & Head of UX/Design ![]() @agustinesperon
@agustinesperon
Even though it’s known fact that animations don’t have large amounts of textual information, you’ll always inevitably need to include short phrases or words in your video that are key elements when describing important concepts.
Smooth-running animated text can make a significant difference visually and hook your audience till the end of the video, instead of just dropping off mid-way through.
You can easily create these text animations with Wideo and achieve the professional look you’re after.
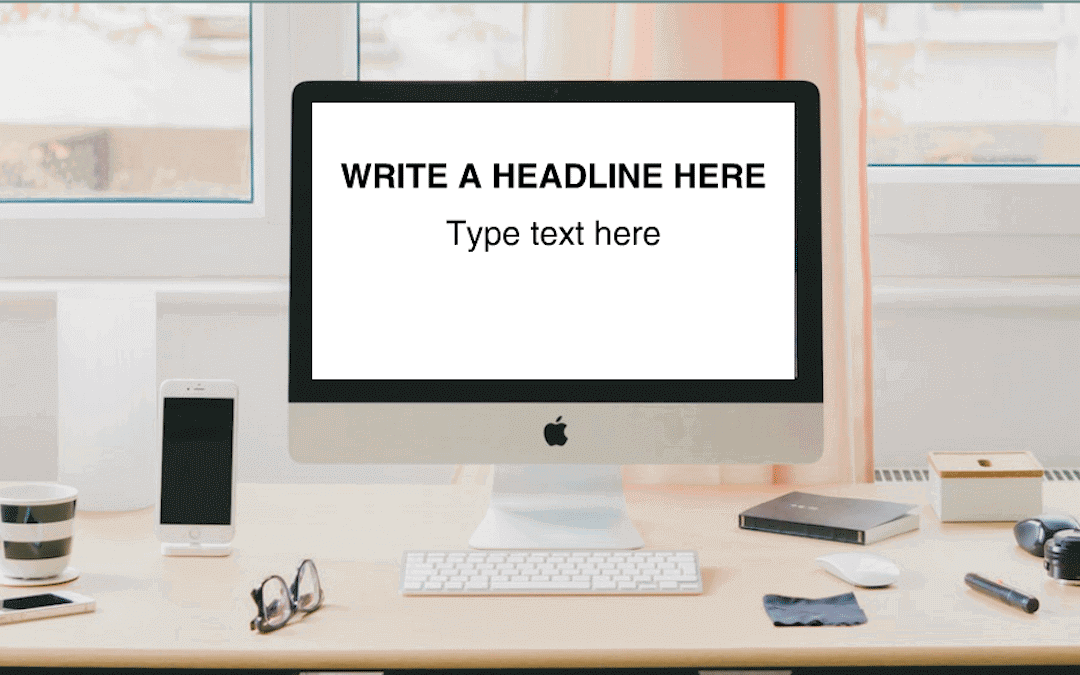
This is the text animation we’ll be working on:
How to do it
To achieve this animation effect, we’ll have to combine two types of animations.
With Wideo, you can animate objects automatically with In/Out effects, or define more personalized animated movements with keyframes.
Find out what in/out effects are here.
1. Insert text into your scene and give it a style. Select a font, color, and define the text size.
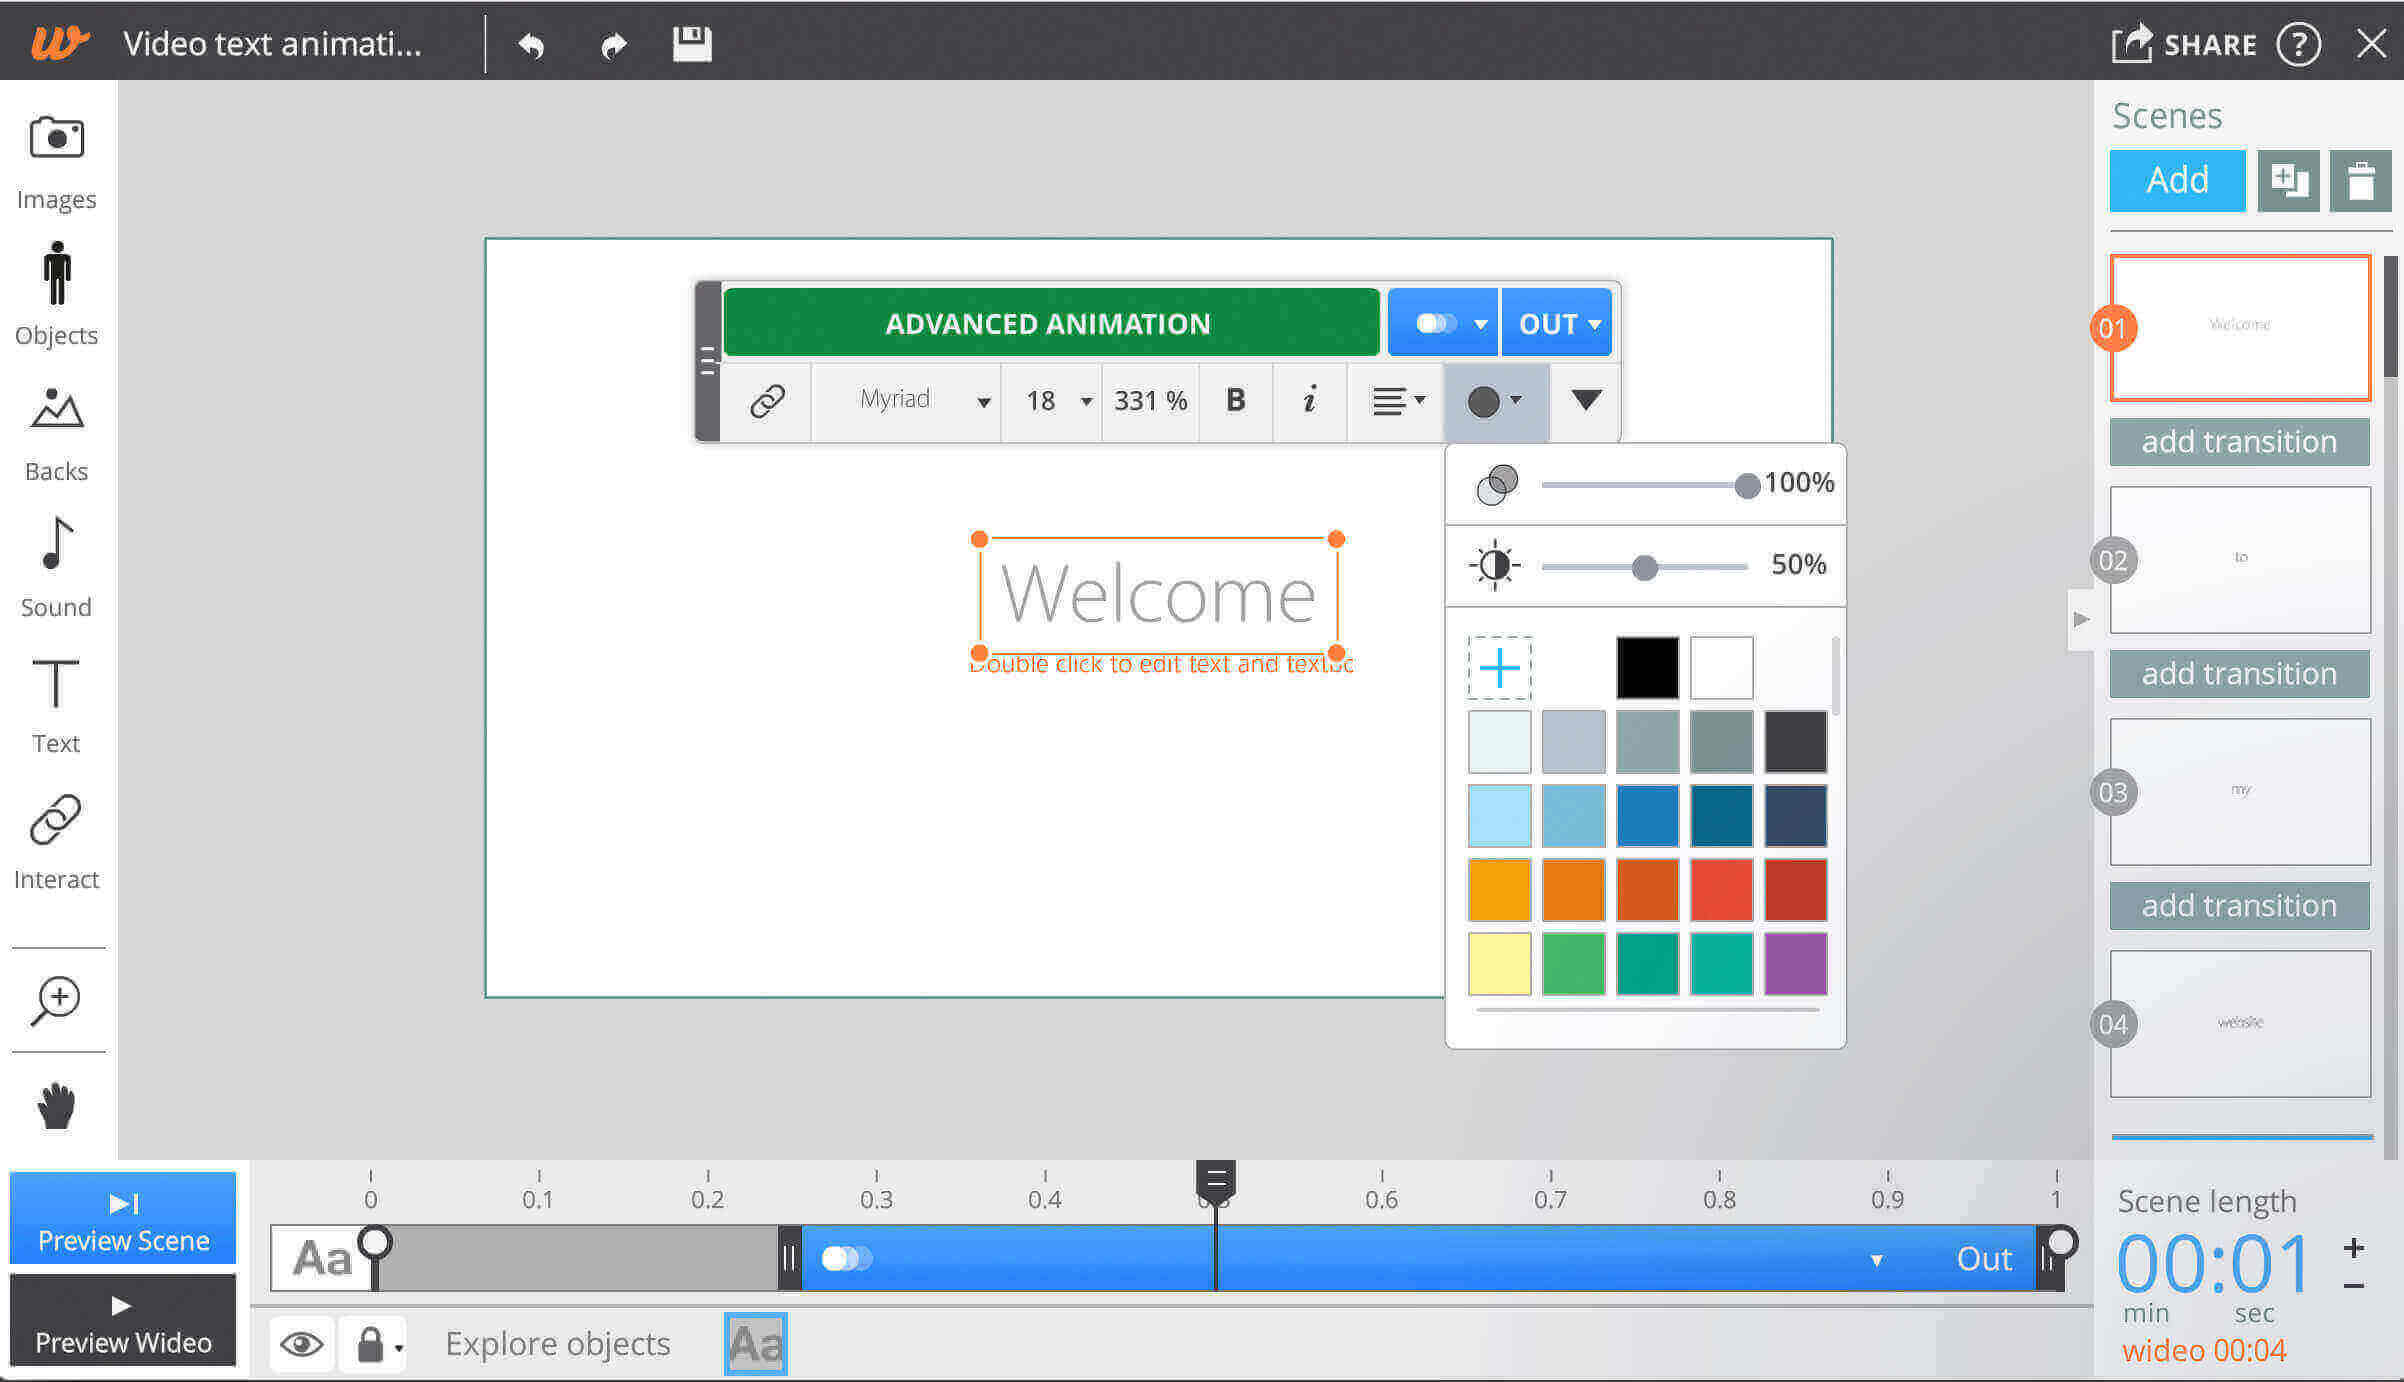
2. Then click on “Animate object” to enter animation mode and slightly reduce the text-scale with your arrow over one of the text box corner points.
Once you’re happy with the initial size, click on “Define start ” to register this first movement.
3. Now, enlarge the text scale until it’s the final size you would like it to appear on screen, and then press “Confirm” in order to register the final text size.
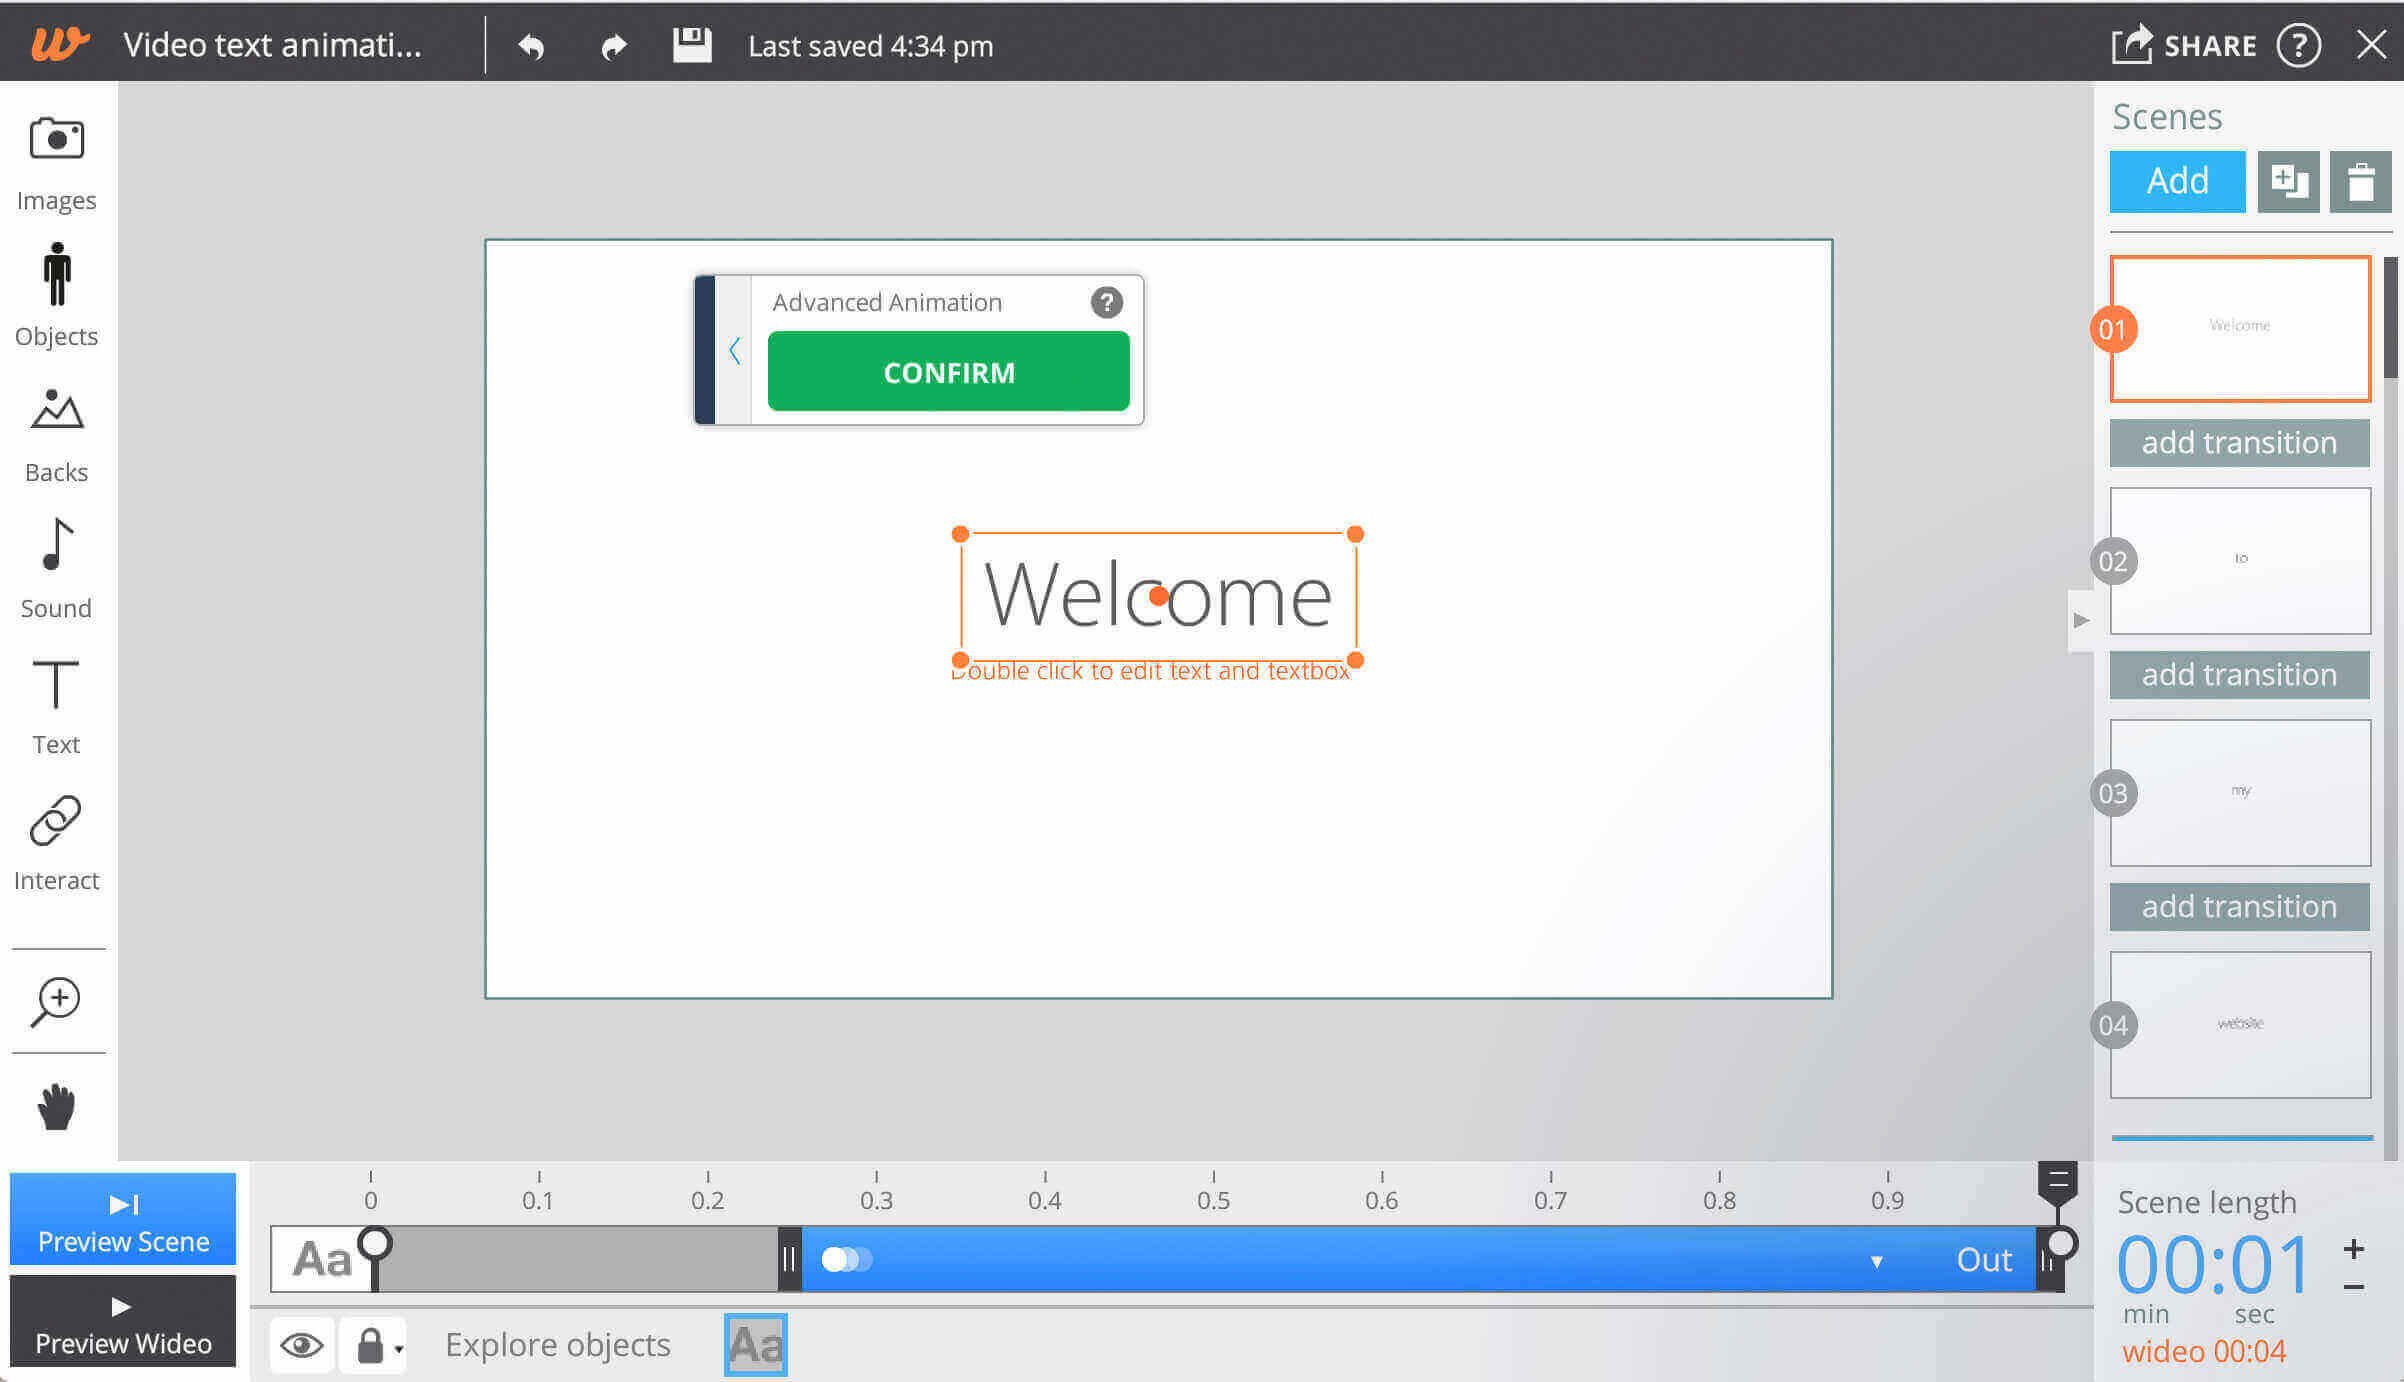
Click on “Preview Scene” or press the Enter Key on your keyboard to see how it looks up till now.
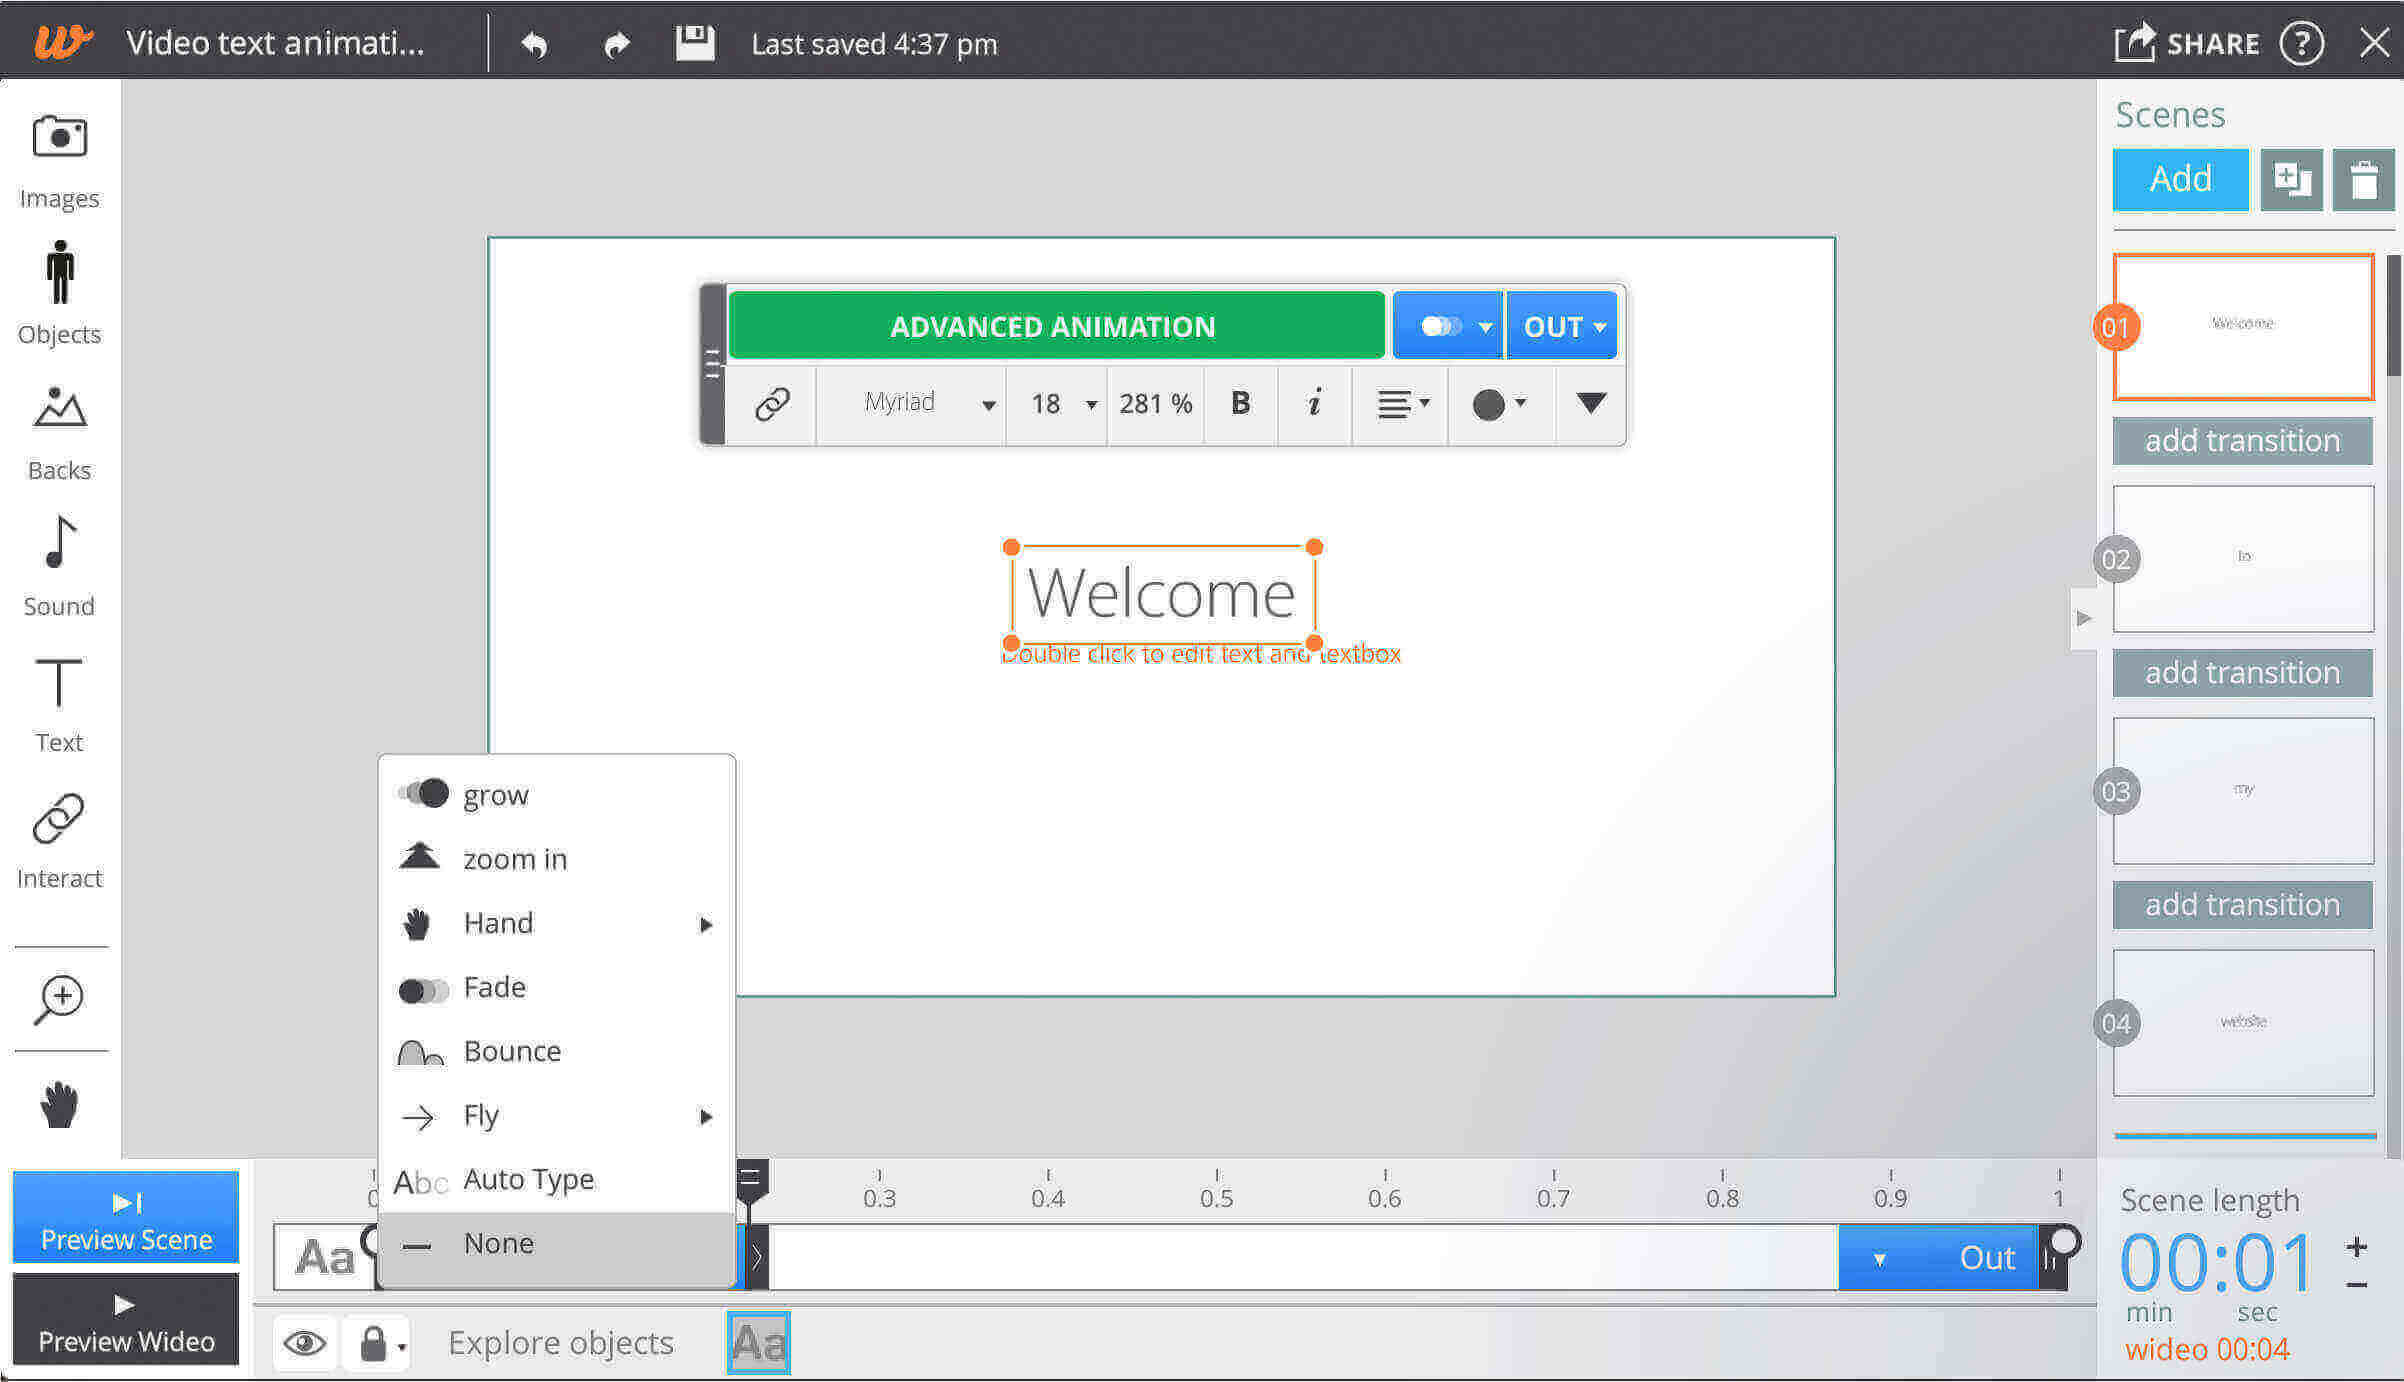
Now we’re going to combine this animation with an automatic Fade-In effect.
4. Select the text and click on the blue “In” button located over the timeline and select “Fade” effect option located in the menu.
You now have a professional animation comprised of two Wideo animation tools.
5. You can extend the duration of the Fade-In effect by stretching one of the ends, as well as making the re-size animation faster or slower, by moving the second keyframe to the left or right.
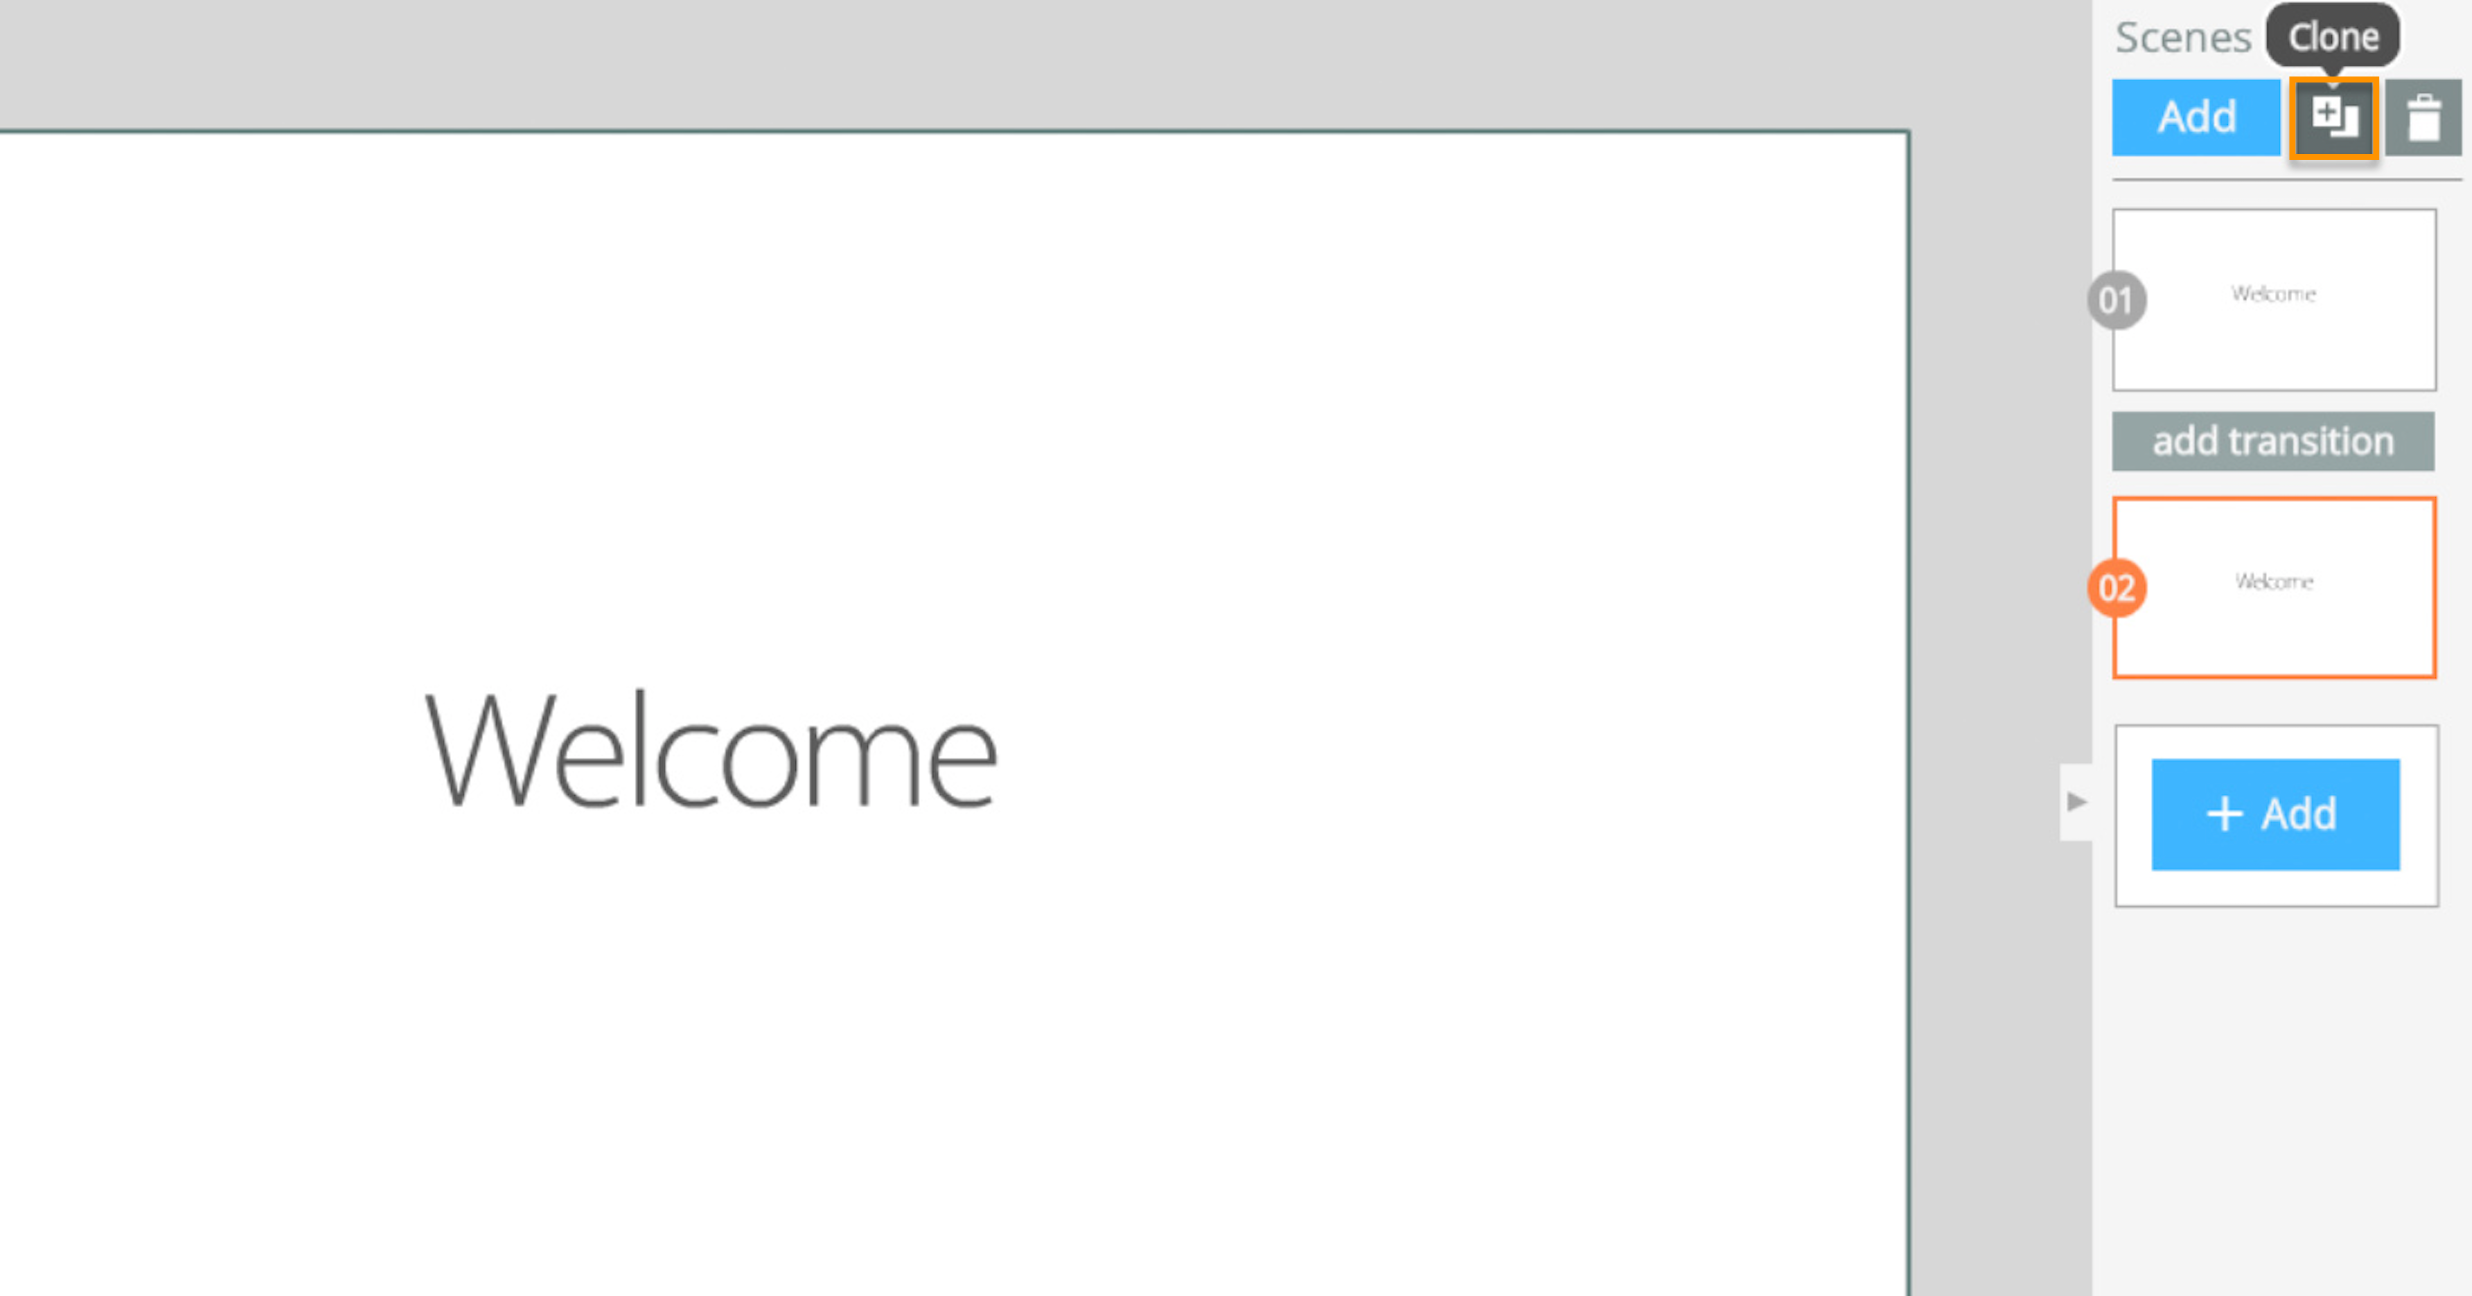
6. Finally, clone this scene as many times as you like. All you’ll have to do is edit the text in each scene, without having to repeat the animation process. You’ll be saving a ton of time!
Press the Preview Wideo button or “Shift+Enter” to see how your wideo turned out after editing your text.
The result, once again. Feel free to re-use it for your own wideos!
I hope this straightforward animation tip is useful to you so that your wideos look more professional.


I want to use it
Love it
We’re thrilled you liked it Sanaa! Use and customize it to your liking!
I can seem to find everything but I am not able to find animate objects
Hi, there! Thanks for your comment. Our apologies, this tutorial will soon be updated with the redesigned the Wideo interface! The “Animate object” button is now called “Advanced Animation.” I’ve attached a screenshot here 🙂
Let us know if you need help with anything else! Happy Wideoing!