Creating a Facebook video ad has never been so easy. You don’t need special skills or previous experience — all you have to do is follow a step-by-step process.
If you’re familiar with creating ads on this social network, video will take you to the next level.
Facebook video ads receive up to 30% more views and populate up to 11 times larger in news feeds. Also, a video is more memorable and likely to be shared.
It’s also said that by 2020, over 75% of mobile data traffic will be video. Check this 2020 Mobile Video Traffic Predictions if you need more excuses to keep reading.
And I’m not sharing this with you just because I’ve read those stats. I’ve also tested it with my team. We saw an improvement of 224% in our Facebook Ad campaign CTR using Video versus a static image ad.

In this post, I will try to teach you the basics of how to effectively create Facebook video ads, as well as how to create videos easily with Wideo to get awesome conversion rates and engage with your target audience.
In fact, you can even use the very same video I created for this campaign. (Scroll down to find the link.)
Let’s go!
Create a Video
You can start with a simple video filmed on your smartphone.
If you already have a video, you can jump straight to the Create the Ad section.
Your video doesn’t need lots of production to engage your target audience on Facebook, because people watch all kinds of content there.
Think of your own habits. You probably scroll down looking for interesting and easy-to-understand content while you relax and have fun.
At Wideo, we’ve tested different kind of videos. We discovered that we get the best results with simple and short animated videos, which are very fun and get straight to the point.
Also, they’re very easy to create using our tool.
Here’s how you can make your own:
1 To start, define your ideas

You probably already have great insights about your desired customer, so that will be your audience! Think about the best approach to reach them.
Are they children, adults, or mostly teenagers? This can help determine what kind of graphics or words to use.
What is the value proposition you need to sell to make them click your CTA?
Remember, you are competing with tons of other content to stand out. Make sure your message and promise is attention-grabbing and clear.
Read more about what a good video needs to succeed.
2 Get a Wideo account
If you haven’t done so already, sign up for a free 7-day trial. (You will need a plan to download the video.)
Create a video in minutes
You can pick a template to create your ad or start from zero. If this is your first video, I strongly suggest starting with one of these video templates:
Generic Business Presentation
Business Video Template
Business Video Promotion Template
Find more Video Templates here.
Once you’ve found a template that fits your needs, it’s just a matter of spending a few minutes to change the text and images.
If you need more help, here’s a 2-minute video that explains the basics about editing your first template.
If you want to dig deeper, visit our learn page. It’s full of short videos that will turn you into a marketing video master.
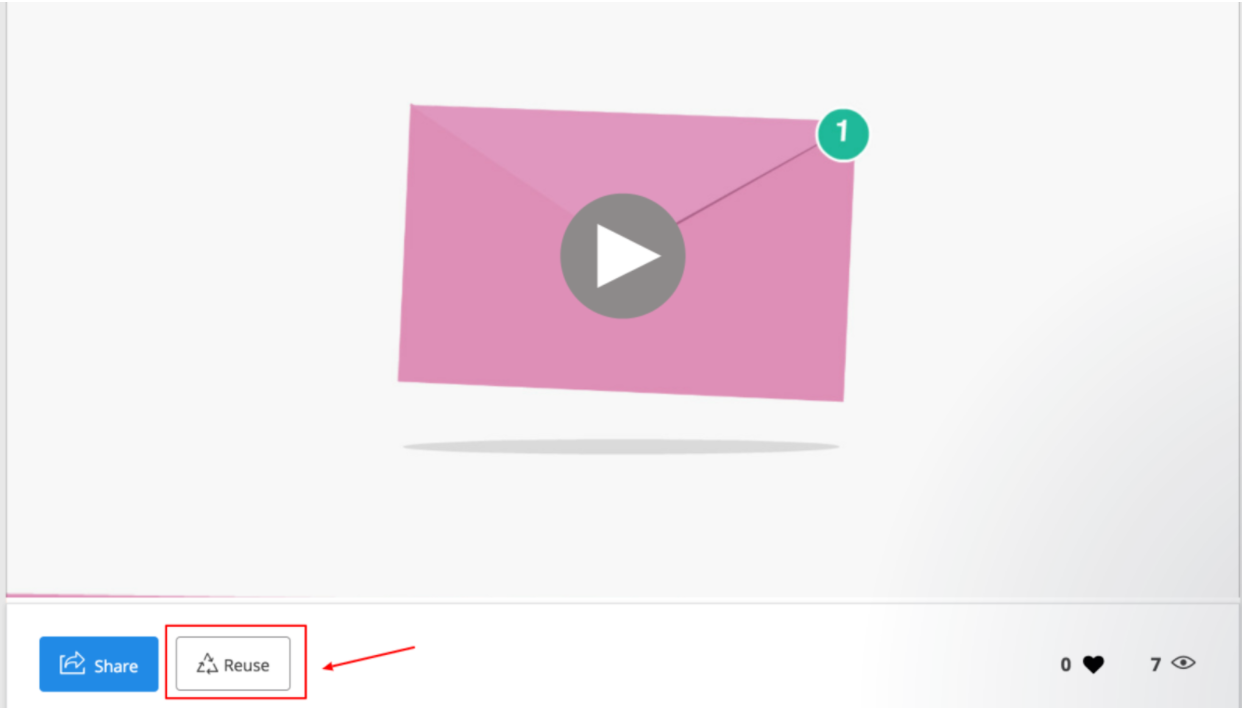
As I said above, you can also use the very same Video Ad I created for our own Facebook campaign, which improved our ad CTR more than 200%!
Just go here and click the “reuse” button.
Try to limit your video to 15 seconds, which is the optimal length recommended by Facebook itself.
Every detail is important to increase the success of your video.
Facebook also recommends limiting the text in video ads. Try to keep it to a minimum to avoid Facebook restrictions.
This makes sense considering that human eyes and brains are more likely to focus on images than text.
And if you include human faces, you will get even more attention. This is a neurological fact; you can read more here.
3 Download the video
As I’ve said above, you will need a paid plan to download your video.
On the pricing page, you’ll see that you can download up to 10 videos/month with a Basic plan.
Basic costs just $19/month if you choose the annual billing option.That’s a good place to start.
Once you’ve finished the video, it’s really easy to download it to your computer.
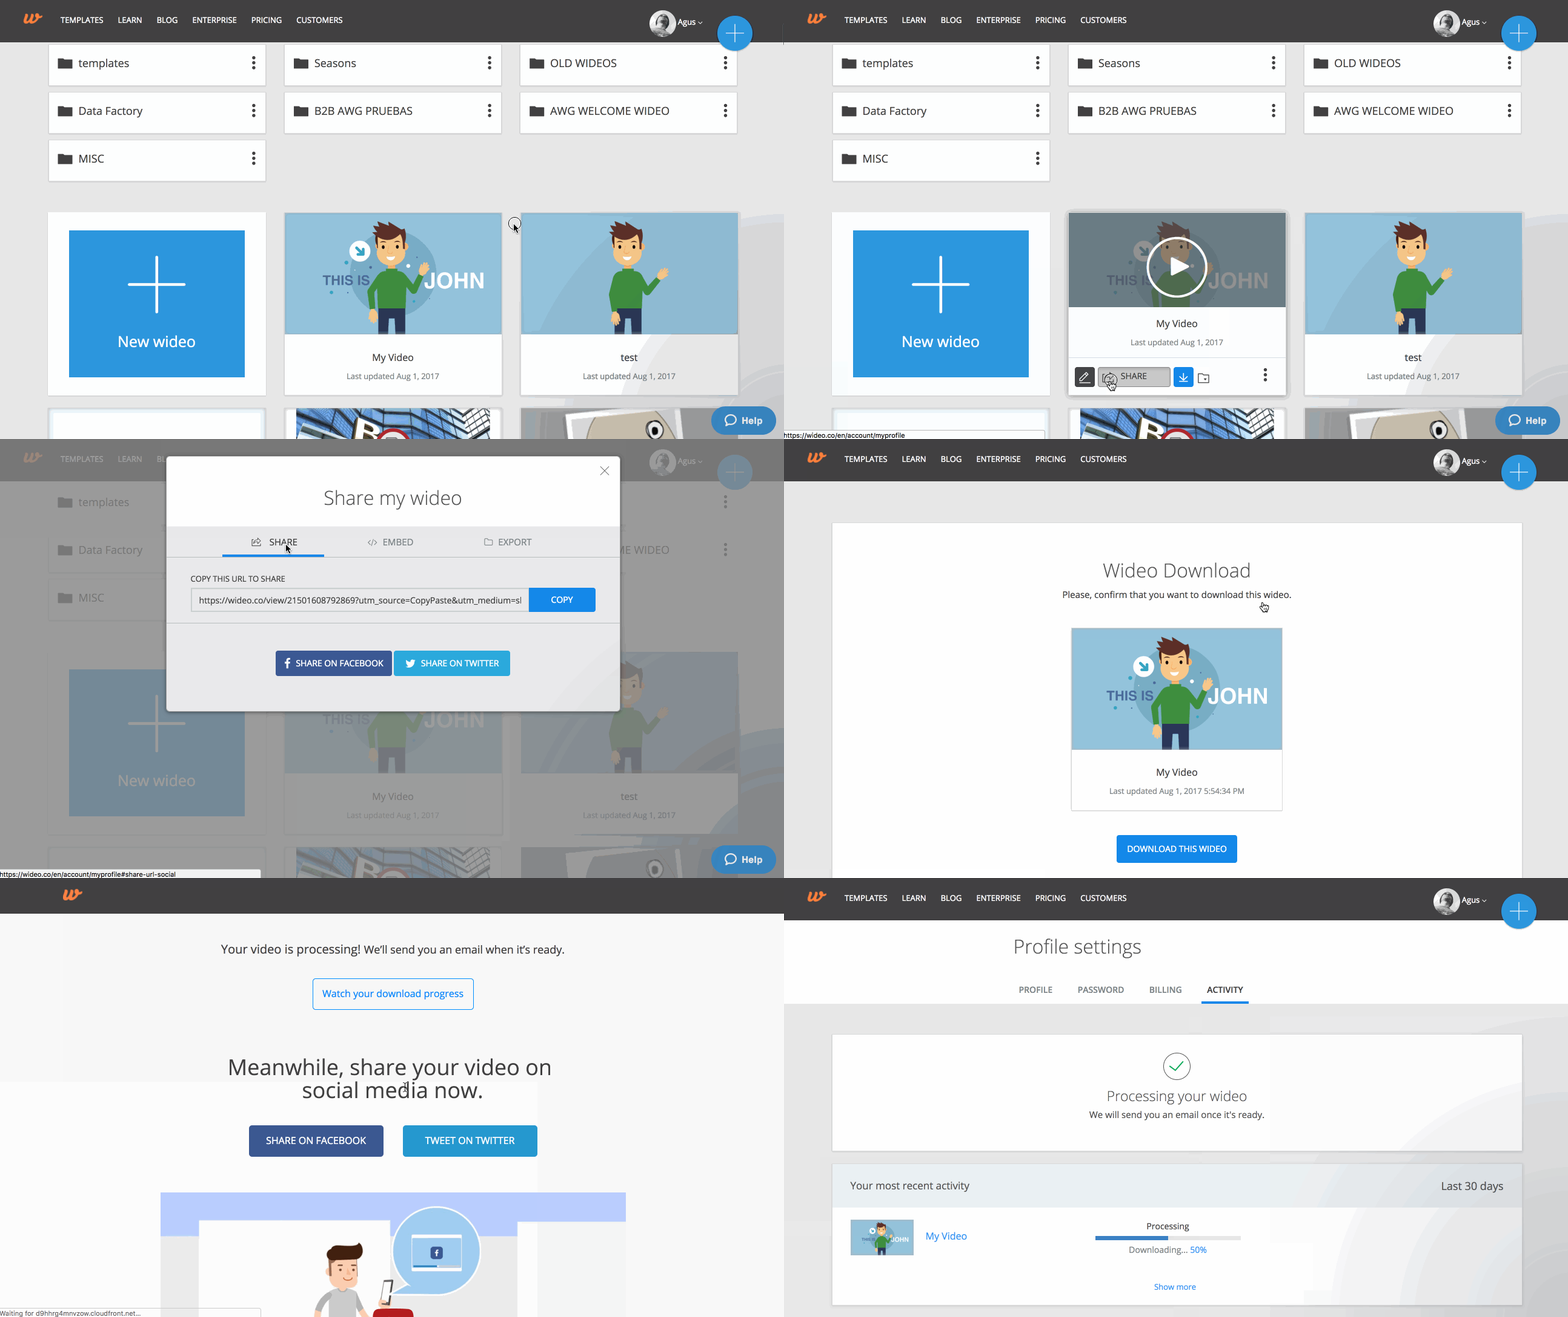
Click here for more information about downloading videos

4 Create your Campaign
This is a really simple step-by-step process, so you don’t need to be a super online marketing ninja or have complex skills to do a good job.
Remember, I’m just a designer and even I could do it 🙂
Go to your Facebook page and click the little arrow beside the help icon. Then, from the drop-down menu, select Create Ads
Define Objective
You will be directed to the main Ads page, where you can choose the objective of the campaign.

In this case, we will create a campaign with the goal of engaging more people on our Facebook Page. Which means more likes, comments, etc.
Select Engagement from the list.
Now let’s click on Page likes. This is what we want to get from this campaign. Then give the campaign a name related to its main objective and click continue.

Add a name that makes sense to you for your set.
A set is a group of ads that share the same budget, schedule, delivery optimization, and targeting.
So give this group a name and then play with different versions of the ads within this group.

In the Page module, select the Facebook page you want to promote from the drop-down menu.

Create your audience
Choose one or several desired audience locations. You can just type in the input box and Facebook will suggest results.

Keep scrolling down and fill in the detailed targeting section by typing keywords you know your potential audience is looking for.
Again, Facebook will give useful suggestions to make this work even easier.

Make sure you select exclude people who like your Page from the Connections drop-down.
With this option, you avoid reaching (spending money) on people you’ve already engaged.
Finally, click save this audience. You will be able to use the audience you’ve just created for future campaigns.

In the next section, Placement, we will follow Facebook’s advice and leave the default option checked (automatic placements).
Budget and Schedule
Here is where you’ll define how much you’d like to spend and when the ads will be shown.
In this case, we are using a daily budget, so you can pick a custom start and end date.
Hit continue. We’re almost there!

Now select single video in the format module, as we are going to create a video ad.

You will be asked to upload a video from your computer or select one from your Facebook library.
Preview Image
The next step is to decide which thumbnail will be shown as a preview image before the video begins to play. This is very important!

This is the first potential point of friction that will affect your ad.
Think about how you would react to the thumbnail the first time you see it while you’re scrolling through Facebook content.
Make sure to select the image that best represents your content, either from the suggested options or by uploading your own from your computer.
You play the video on your computer, pause it when you get to a good frame, then take a screenshot of that frame.
Just in case you don’t know how, here is more on how to take a screenshot of a selected area of your screen for MAC and PC.
Text
Write a short and good text for your ad. You can check how the ad will be shown with changes updated in real time with the preview on the right.

This is another key piece of your video ad (or any Facebook ad you create).
Make sure to write a clear and believable value proposition to explain why people should click on your ad.
Then click the green confirm button to go to the final stage.
Set up A/B testing
This is a great opportunity for you to experiment and see for yourself how video performs compared to static images.

The easiest way to do this is to duplicate the video ad you’ve just created and replace the video with an image.
Click your ad checkbox and press duplicate.
This will create an identical copy of your ad and another window will appear.
Select Image instead of Video.
Facebook may suggest an existing image, but you can click clear images to upload a new one.

Click upload and select an image from your library or upload a new one in the image browser pop-up that appears.

Once you have the right image for your ad, click review draft items and then confirm it n the next window.
Measure
None of this makes sense if you can’t measure which option performs the best so you can continue to optimize your ads.
To have the most important engagement metrics in your campaign main page, click the “+” button at the right of the column titles to add custom columns.

A drop-down with suggestions will appear. Click add other columns.
Look for “Impressions” (you can enter the word in the search input) and click the checkbox to add it to the selected columns.


Now, drag the impressions rectangle (at the right of the screen) to the top of the list so it’s the first thing in your metrics panel.
Repeat this steps adding CTR (All) and Clicks (All) columns. Finally, click apply.
This is how your campaign dashboard should look like with the columns you’ve just added, plus the A/B testing (Image Vs. Video).

All you have to do now is activate both versions by clicking the toggles.

That’s it! You’re now running a Facebook Video Ad!
Conclusion
Facebook Video Ads can significantly improve the effectiveness of your campaigns.
That means more engagement with your target audience, and more conversions, which means greater profit.
Try A/B testing previously created image ad campaigns with video variants, then measure the improvements.
Once you see the results for yourself, you’ll probably want to start investing a little more time on short videos.
I hope this guide helps you increase your conversions.
Good luck!
Share with me what other video marketing strategies you’re implementing
 Agus
Agus
Wideo Co Founder & Head of UX/Design
 Agus
Agus

