How to create a storyboard for your video?
Whether it’s to organize your creation process, share the idea with your team, or explain to your client how the video will convey the message, the storyboard is a key tool for your work.
What is a storyboard?
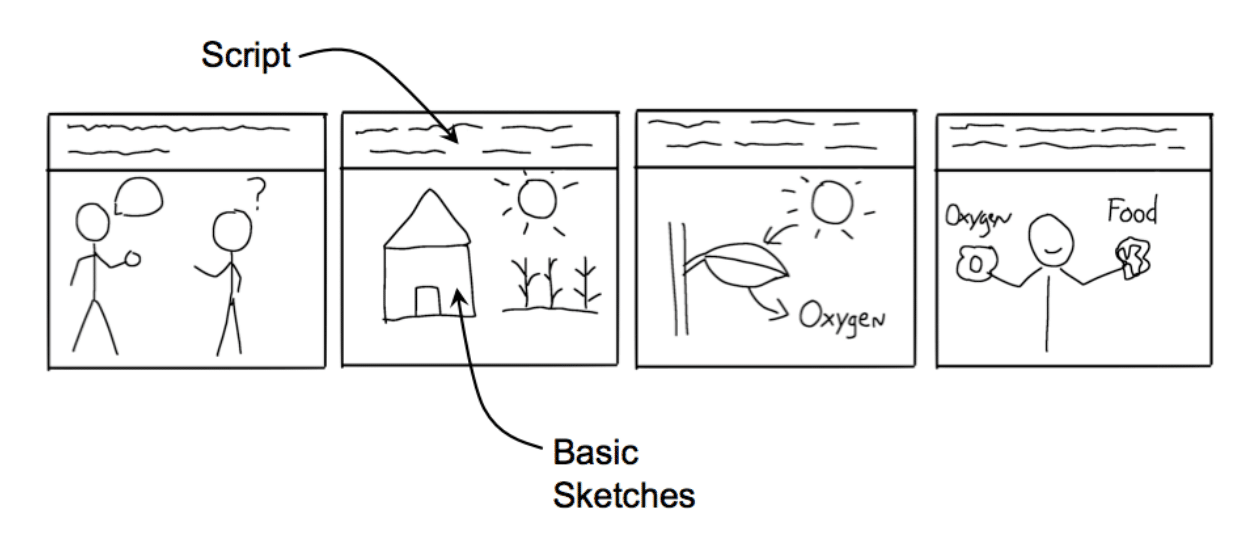
A storyboard is very similar to those comic strips from your childhood. It’s a mosaic of basic sketches and annotations that denote actions, movements, dialogues, sounds and/or voice-overs.
Regardless of how simple or complex your video is, the storyboard will simply help you make the following steps easier to follow.
Even Pixar follows this basic drawing process for their super-produced feature films that have millions of dollars of investment. It helps them ensure that the story makes sense and is understandable.

As we said, you should already have a script. But you don’t let that word scare you either.
A script can be something as simple as this:
- This is John.
- John has a great business, but he has a problem.
- (Description of the problem.)
- But he has discovered the solution: (product / service name.)
- Be like John, and improve your business with (product / service name + logo + call to action.)
The double function of the storyboard
A. Planning
- Message verification: will the video effectively communicate the message I want to convey?
- Story check (storytelling): is the succession of events understandable and interesting enough to keep the viewer’s attention?
- Duration check: in seeing the rough number of scenes you’ll need to tell the story, you’ll have an idea of the approximate video length. Keep in mind that our attention spans are constantly becoming shorter. So, explainer or promotional videos probably shouldn’t last longer than a minute.
- Checking the necessary elements: the act of diagraming each scene will help you understand what elements, images, etc. will be necessary to convey each action (example: office background; a character typing on a computer, etc)
B. Communication
In converting each scene into an image, it’ll be easier to convey your vision of how the story should be told.
IMPORTANT
Storyboarding (like other stages in the video creation process) should be a time where edits are made and ideas debated. It’s extremely important to check and verify everything in each stage. It’s always better (and cheaper) to find mistakes or things to improve before going to the next stage.
In short, a storyboard will help you save time (and money) by making preliminary edits that would otherwise be made to the finished video.
For example, it’s much easier and faster to change the order of the story during the storyboard stage than once the video has been created.
How to create the storyboard
The first thing you’ll need is a framework or template where you can work on your storyboard. You can simply draw a series of squares that represent “Scene 1”, “Scene 2”, etc. with space for descriptions below.
Or you can use our Wideo storyboard generator, which helps you create one step by step and can be later shared with whoever you want.
2 ADD THE SCRIPT
Under each square, write the part of the script, dialogue, or phrase that corresponds to that scene.
For example:
SCENE 1: This is John.
You can also briefly describe the action (sad character waving his hands with an office background).
Make simple drawings of the actions, without trying to make them works of art.
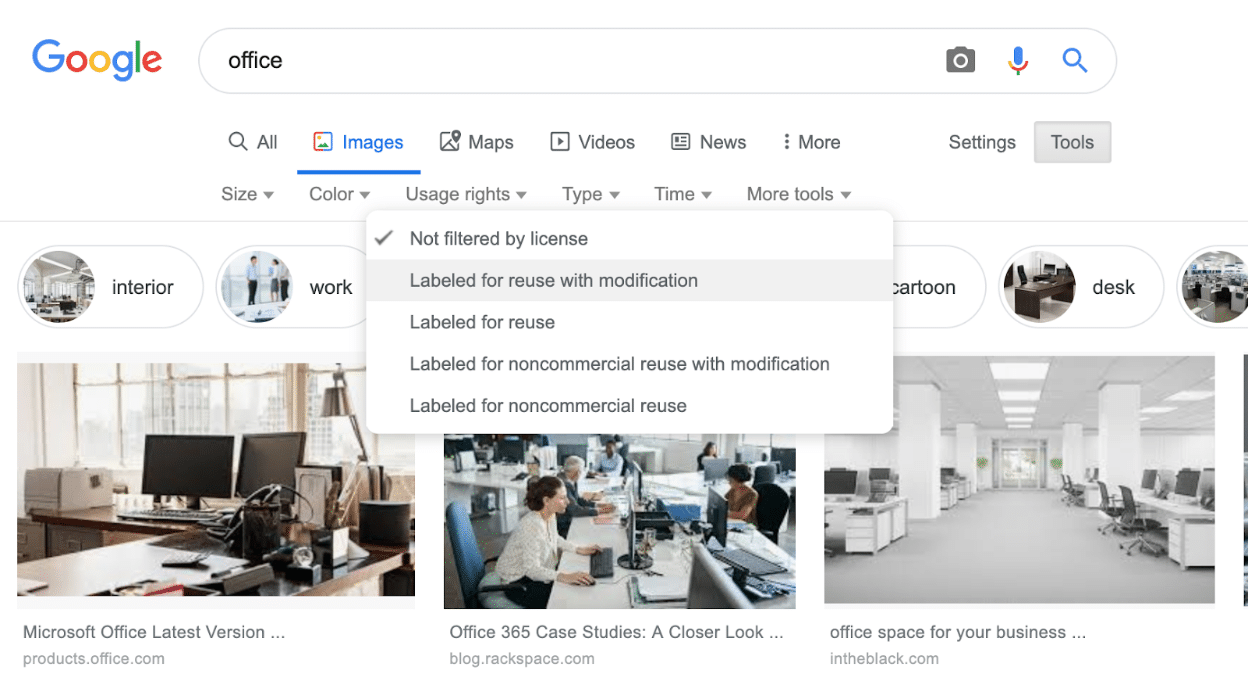
Remember, if you’re not up to drawing you can always search for images on Google. Here you won’t have to worry about copyrighted images, since the visuals used will be for internal use only and not used in the final version of your video.
Alternatively, you could filter your Google searches for images that aren’t copyrighted in case you want to use the storyboard images in your final video.
Watch this example of a storyboard and video we’ve created a few years ago
Is your business ready to discover the power of video? Try Wideo and create your own videos today.

Related posts:
 How to use Video Marketing on LinkedIn (Upload Native Videos!)
 How to Make Instagram Videos like a Pro
 4 Advanced Video Marketing Strategies For Social Media
 12 Instagram Video Ideas for SMBs to Increase Sales
 SEO Optimization for videos – 10 Effective Strategies
 Why you should add a voiceover to your video using text to speech technology